


Welcome to the diesel generator set operation tutorial of Fujian Taiyuan Power Technology Co., Ltd. We hope this tutorial will help users better utilize our generator set products. The generator set featured in this video is equipped with a Yuchai National III electronically controlled engine. For other models with slight differences, please consult our after-sales personnel for details.
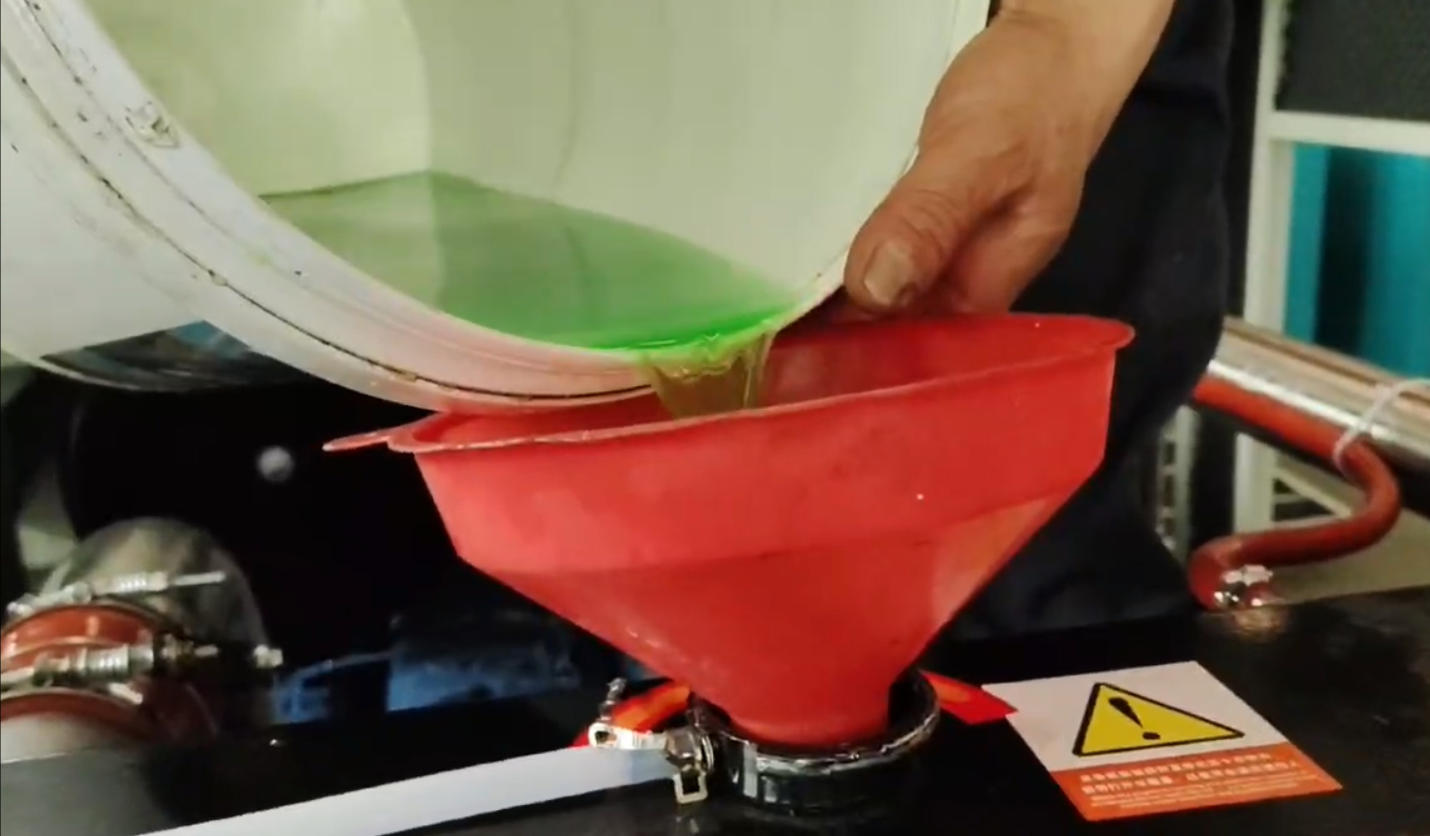
Step 1: Adding Coolant
First, we add coolant. It must be emphasized that the radiator must be filled with coolant, not water, to save costs. Open the radiator cap and fill it with coolant until full. After filling, securely close the radiator cap. Note that during the first use, coolant will enter the engine block’s cooling system, causing the radiator fluid level to drop. Therefore, after the initial startup, the coolant should be replenished once.
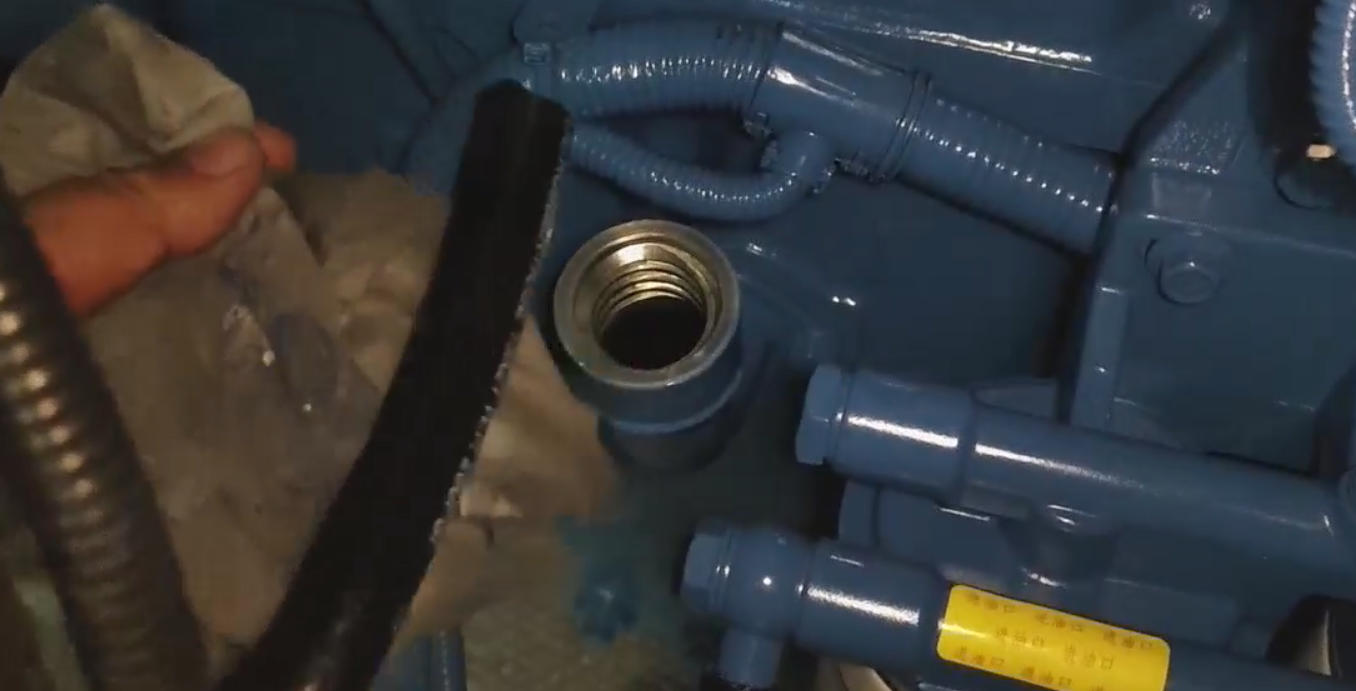
Step 2: Adding Engine Oil
Next, we add engine oil. Locate the engine oil filler port (marked with this symbol), open it, and begin adding oil. Before using the machine, customers may consult our sales or after-sales personnel for the oil capacity to facilitate the process. After filling, check the oil dipstick. The dipstick has upper and lower marks. For the first use, we recommend slightly exceeding the upper limit, as some oil will enter the lubrication system upon startup. During operation, the oil level should remain between the two marks. If the oil level is correct, securely tighten the oil filler cap.
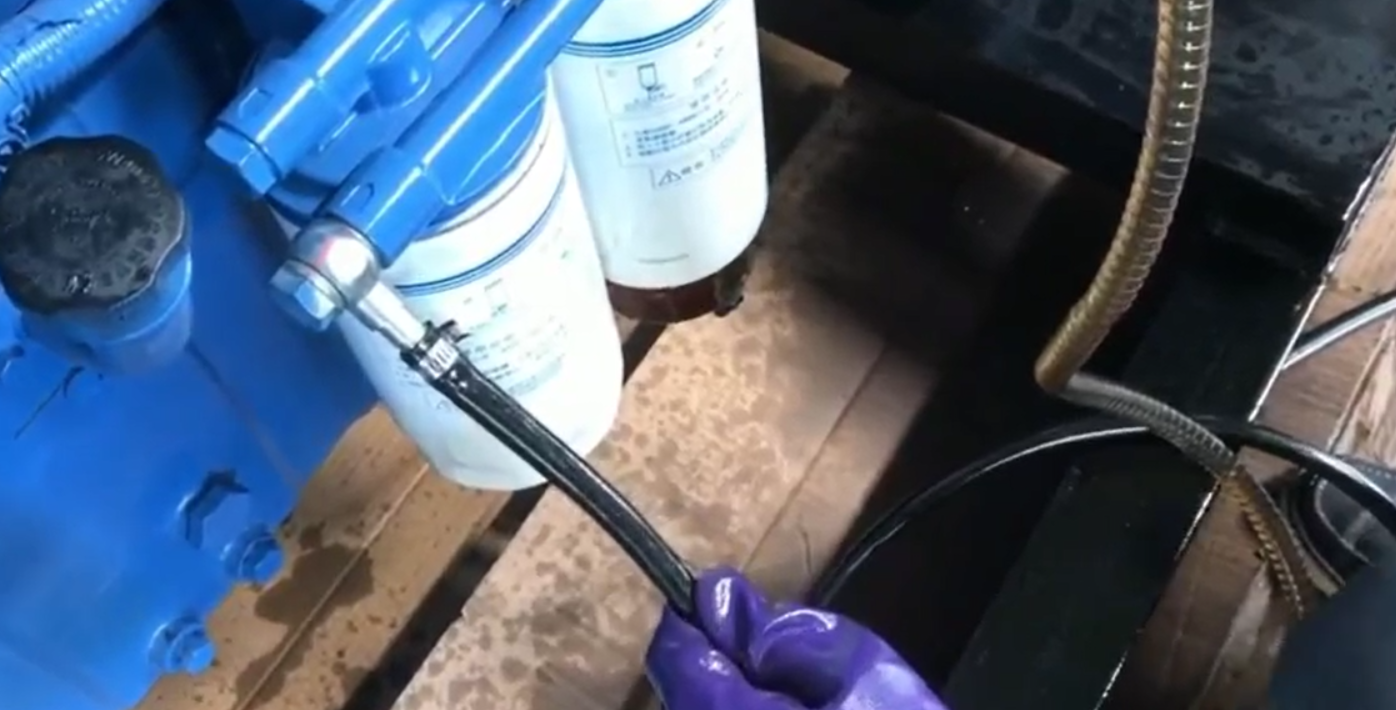
Step 3: Connecting the Diesel Fuel Lines
Next, we connect the diesel fuel inlet and return lines. Locate the fuel inlet port on the engine (marked with an inward arrow), connect the fuel line, and tighten the clamp screw to prevent detachment due to vibration during operation. Then, locate the return port and secure it in the same manner. After connection, test by gently pulling the lines. For engines equipped with a manual priming pump, press the pump until the fuel line is filled. Models without a manual pump will automatically pre-supply fuel before startup. For enclosed generator sets, the fuel lines are pre-connected, so this step can be skipped.
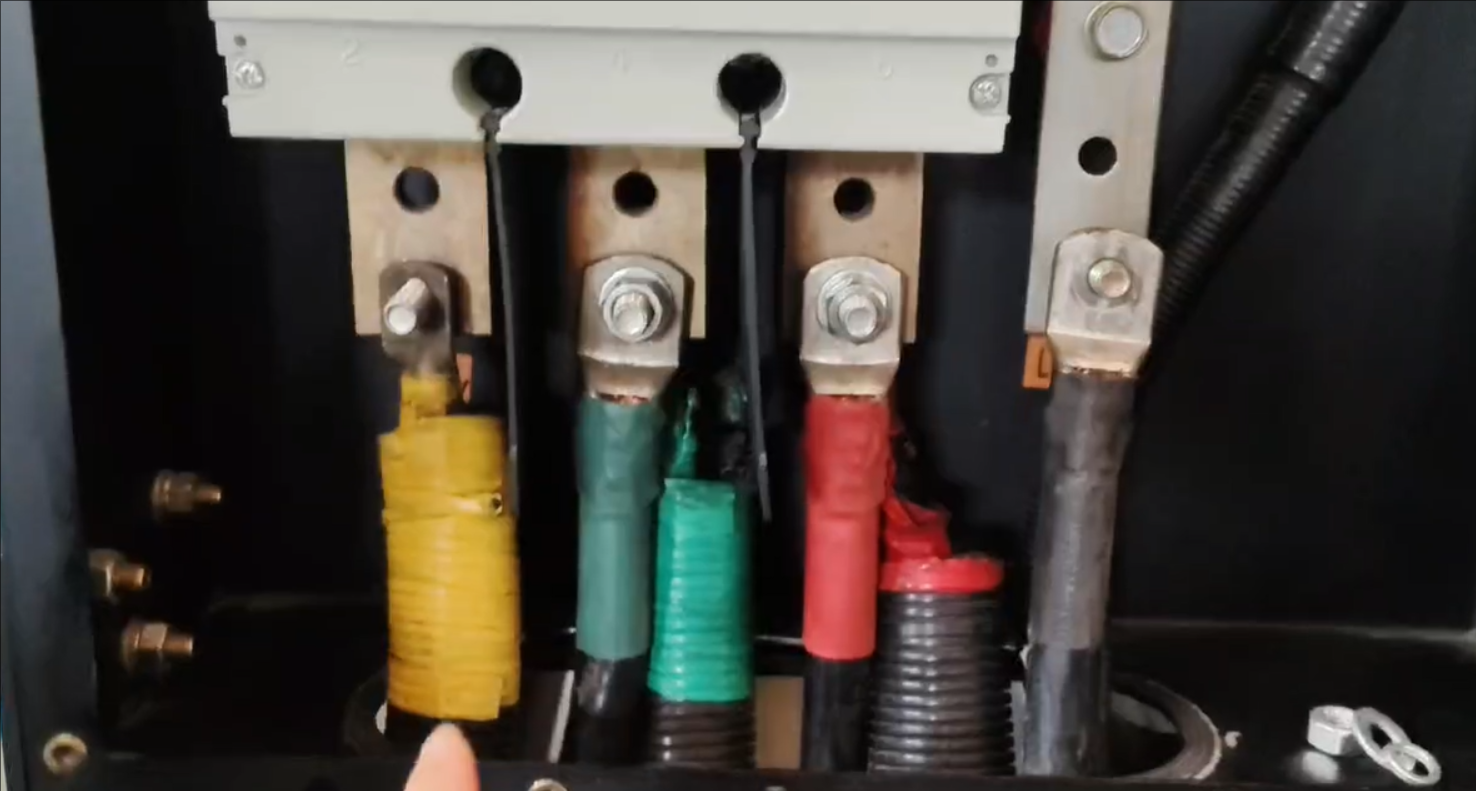
Step 4: Cable Connection
Determine the phase sequence of the load and connect the three live wires and one neutral wire accordingly. Tighten the screws to prevent loose connections.
Step 5: Pre-Start Inspection
First, check for any foreign objects on the generator set to prevent harm to operators or the machine. Then, recheck the oil dipstick and coolant level. Finally, inspect the battery connection, turn on the battery protection switch, and power on the controller.
Step 6: Startup and Operation
For emergency backup power (e.g., fire protection), first connect the mains signal wire to the controller’s mains signal port. In this mode, the controller should be set to AUTO. When mains power fails, the generator will start automatically. Combined with an ATS (Automatic Transfer Switch), this enables unmanned emergency operation. For non-emergency use, simply select Manual Mode on the controller and press the start button. After warm-up, once the controller indicates normal power supply, the load can be connected. In case of emergencies, press the emergency stop button on the controller. For normal shutdown, use the stop button.
Post time: Jul-15-2025


